はじめに #
ドキュメント生成ツールSphinxを導入し、HTMLファイルを生成するまでの方法をまとめました。
SphinxはPython上で実行できるツールであり、reStructuredText (reST) という形式のテキストファイルからHTMLやPDFなどのドキュメントを作成できます。HTMLファイルを生成できるため、静的サイト公開サービス(Cloudflare PagesやNetlifyなど)を利用して、ウェブサイトを無料で公開できます。
また、この記事では触れませんが、Sphinxの拡張機能を用いることで、Markdownファイルの変換、MathJaxによる数式の記述、Mermaidによるグラフ生成なども可能です。
この記事では、Sphinxのインストール、プロジェクトテンプレートの作成、HTMLファイルの生成について解説します。
環境 #
OSはWindows 10 Home Ver. 21H1です。
- Python v3.9.7
- Sphinx v4.2.0
Sphinxのインストール #
Pythonは既にインストールされているものとして、Sphinxパッケージをインストールします。
Conda環境では以下を実行します。-c anacondaによって、パッケージの検索先をanacondaのチャンネルに指定します。
conda install -c anaconda sphinx
pipの場合は以下を実行します。
pip install sphinx
プロジェクトテンプレートの作成 #
適当な空フォルダを作成し、その中でPowerShellを起動します(エクスプローラ上でshiftキーを押しながら右クリック→「PowerShellウィンドウをここで開く」)。次に、sphinx-quickstartというコマンドを実行します。このコマンドは対話形式でSphinxプロジェクトのテンプレートを作成するものです。
> sphinx-quickstart
Welcome to the Sphinx 4.2.0 quickstart utility.

Please enter values for the following settings (just press Enter to
accept a default value, if one is given in brackets).

Selected root path: .

You have two options for placing the build directory for Sphinx output.
Either, you use a directory "_build" within the root path, or you separate
"source" and "build" directories within the root path.
> Separate source and build directories (y/n) [n]:
ソースとビルド結果のフォルダを分離するか確認されます。分離しない場合、分離した場合のそれぞれのフォルダ構造を以下に示します。
分離しない場合
root/
├── _build/
├── _static/
├── _templates/
├── conf.py
├── index.rst
├── make.bat
└── Makefile
分離した場合
root/
├── build/
├── source/
|   ├── _static/
|   ├── _templates/
|   ├── conf.py
|   └── index.rst
├── make.bat
└── Makefile
分離した場合、sourceというフォルダが作られ、ソースファイルはその中で管理します。そのため、ルートフォルダをすっきりとさせることができます。
ここではフォルダを分離することにしますので、yと入力します。
> Separate source and build directories (y/n) [n]: y

The project name will occur in several places in the built documentation.
> Project name: MyDoc
> Author name(s): Helve
> Project release []: 1.0.0

If the documents are to be written in a language other than English,
you can select a language here by its language code. Sphinx will then
translate text that it generates into that language.

For a list of supported codes, see
https://www.sphinx-doc.org/en/master/usage/configuration.html#confval-language.
> Project language [en]: ja
続いて、プロジェクトの名前、著者名、プロジェクトのバージョン、言語を入力します。日本語の場合はjaとします。
以上でドキュメントのテンプレートが生成されました。
HTMLファイルの生成 #
続いて、HTMLファイルを生成します。
テンプレートにはindex.rstというReSTファイルがあるので、これをHTMLに変換します。
Windowsの場合、.\make.bat htmlというコマンドを実行します。これは、make.batというバッチファイルにhtmlという引数を与えて実行することを意味します。
> .\make.bat html
Running Sphinx v4.2.0
loading translations [ja]... done
making output directory... done
building [mo]: targets for 0 po files that are out of date
building [html]: targets for 1 source files that are out of date
updating environment: [new config] 1 added, 0 changed, 0 removed
reading sources... [100%] index
looking for now-outdated files... none found
pickling environment... done
checking consistency... done
preparing documents... done
writing output... [100%] index
generating indices... genindex done
writing additional pages... search done
copying static files... done
copying extra files... done
dumping search index in Japanese (code: ja)... done
dumping object inventory... done
build succeeded.

The HTML pages are in build\html.
実行すると、build/html/フォルダにHTMLファイルが出力されます。index.htmlをウェブブラウザで開いてみます。
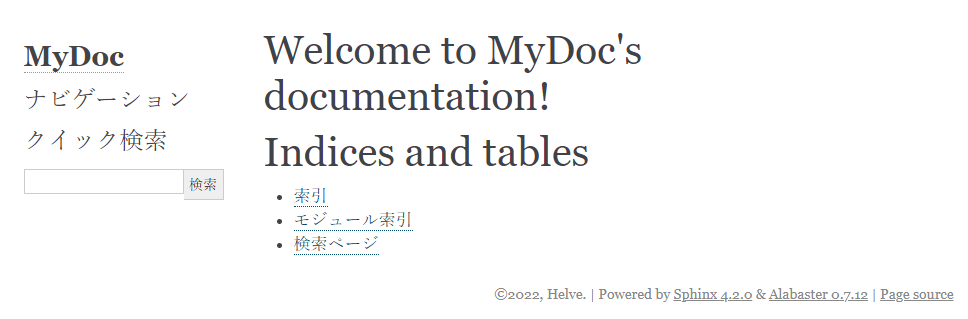
サイトのタイトルやフッターの著者名に、sphinx-quickstartで設定した項目が反映されています。